Elevator Assembly
15 Hours
|
Elevator Assembly 15 Hours |
Elevator: 2, 6, 7, 12 & 13 December
|
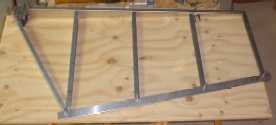
Mark out the the lengths and angles for the frames that make up the elevator. The one in this picture is for the right side looking forward and the 60 degree angle is to allow the rudder to move fully without hitting the elevator. The same markings will be used to set out the left elevator with the eye bolts the last items to be installed once it is aligned with the horizontal stabilizer. |
On
a level surface, mark out the elevator and drill holes
from the trailing edge toward the front making sure the
skin is tight and even across the frame by inserting
clecos as you progress.. |
|
|
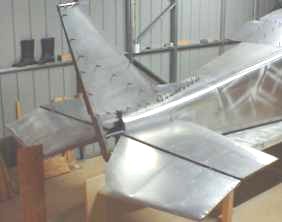
This picture shows both elevators completed
and held temporarily into position with bolts that are
slid through the brackets on the horizontal stabilizer.
The angle represents the lowest position the elevators
will reach after the control rod and bracket are bolted
into position. After the control bracket is fixed into
position a stopper will be bolted into position to
prevent the elevator from going past this position. |