Rudder Assembly
24 hours
|
Rudder Assembly 24 hours |
Rudder: 18 & 19 August
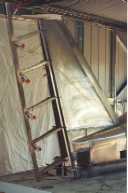
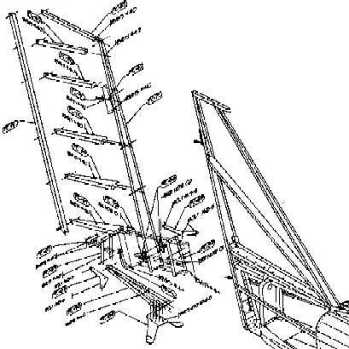
With the fuselage still firmly secured to the workbench, work has started on the setting out of the rudder assembly. As this will be a trike, some of the components shown in the drawing do not have to be fitted and are not included in the kit. The task of getting all the angles right is a little time consuming, especially crimping the ends. to form the traing edge. TIP: Don't drill the holes for the mounting bolts until the frame is constructed and temporarily held into position so the top of the rudder is in line with the top of the stabilizer and the correct distance away. |
|
|
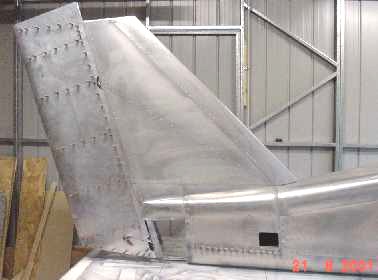
Time to stretch
the preformed rudder skin over the frame leaving plenty
of material at the top and bottom. Start the rivet holes
50mm from the trailing edge, this way the metal will not
dint or go out of shape. Trim the top edges after the
rudder has been hung to make sure it lines up wuth the
vertical stabilizer. |
30 August & 1 September |
|
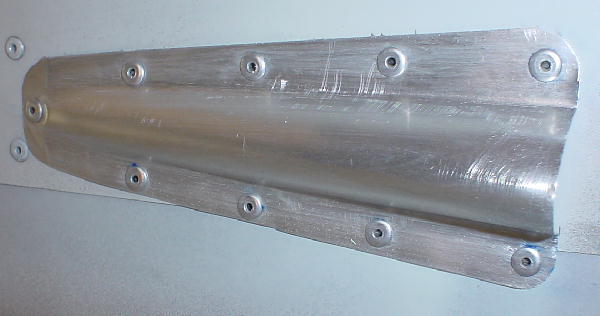
| Following the advice from Sean when I visited
the factory in May 2001, I constructed a rudder cable
protector to aid the aerodynamics of the tail section and
protect the cable as it exits the fuselage. TIP: Use a broom handle to form the shape of the skin and use the hand seamer to bend the flat edges to be riveted to the outer skin. |
 |
|
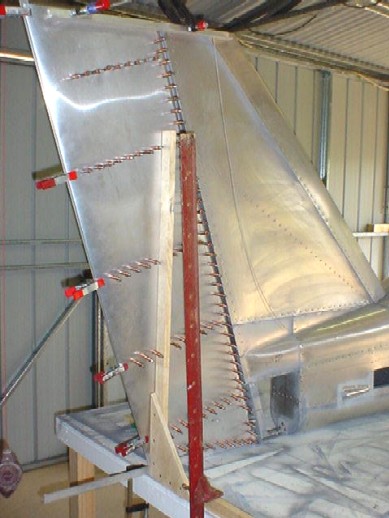
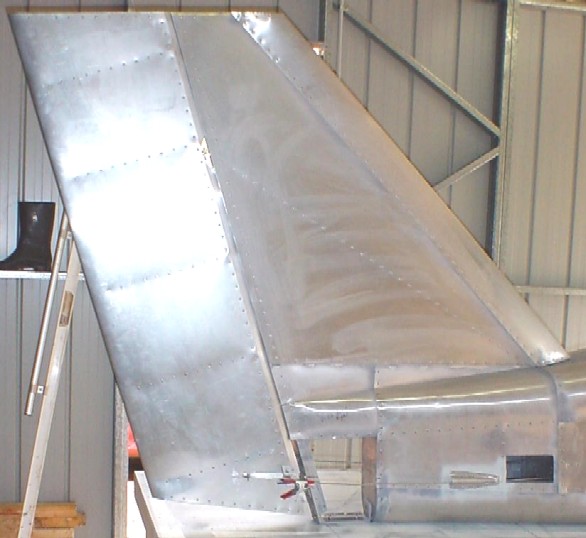
TIP: This image shows how the rudder can be kept vertical and prevent the frame from getting out of shape due to the rudder being wider at the bottom and getting narrower at the top. To make sure the rudder remains vertical above the centre line of the bench, clamp a square to the bench on one side of the rudder and a block of timber on the other side to keep the rudder in-line with the centre line, two lengths of angle on the top of the vertical stabilizer and the rudder, and a length of 1"x1"x1/8" angle along the trailing edge of the rudder. |
7 September
|
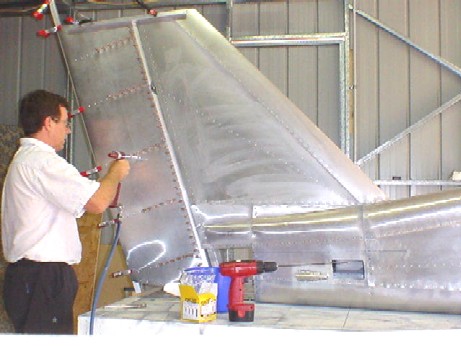
With the edges of the rudder
firmly clamped to prevent warping, start the riveting
from the trailing edge of the rudder toward the vertical
stabaliser from the centre out, i.e toward the top and
the bottom evenly. TIP: The bolts holding the rudder to the stabiliser should be left loose so it can be easily removed and reassembled when needed |
 |