Cabin Fitout

[68 hrs]

February 8, 9, 10 & 11

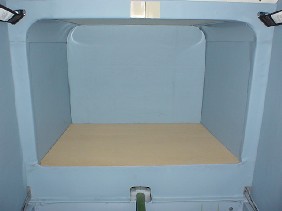
Originally I had decided to locate the battery in the luggage compartment by raising the floor for a utilities storage and /inspection compartment. The utilities compartment will provide easy accessed to inspect the strobe power supply and the trim controls. The battery will now be mounted on the firewall as the Jabiru 3300 engine weighs 81Kg complete with oil, and oil cooler with direct drive to the prop.

Stiffener ribs have been riveted into position at the back, top and sides of the luggage compartment so the delux interior panels and vinyl can be glued into position. Covering the utilities compartment will be marine plywood secured to the back angle bracket with a piano hinge and secured at the front making inspection easy. I will also construct a small toolbox to fit in the compartment with essential spanners, screwdrivers and spare nuts and bolts etc.

March 8, 9, 10, 29, 30 & 31

The inside cabin lining being prepared with clecos holding the skin in position. Thermal insulation has been fitted between the stiffeners to keep the inside of the cabin a little cooler in our sub-tropical weather. When the fit out is near completion and the internal painting has been completed, the vinyl will be glued to the skin

Fold a section of .016" skin to form a cover over the aileron push rods and control arm and fix it into position using self-locking nuts for future inspection and maintenance. Vinyl will be glued to the section so it matches the cabin roof and other section inside the cabin.

Bend a section on .025" aluminum to form a U shaped section to cover the aileron control sleeve that also contains the elevator push rod as well as flat side section that hides the gap between the edge of the seat support runner and the aileron control sleeve. This will prevent objects from falling through the gap and gives you a space to mount a fire extinguisher behind the seats, and maybe drink holders for when you get thirsty on those long flights. Either way it protects the control sleeve and the trim steel cables that pass through the top of the mounting blocks.

Using the automotive upholstery contact glue from both the can where a quantity can be poured over the surface and spread using a piece of aluminum, as well as the contact from the spray can, will cut down the amount of time spent getting an even amount of contact glue on each surface.
Cut and glue the panels with the vinyl in sequence making sure all cables, seat belts and other fittings are secured in position before applying the contact glue. The back panel will not be glued into position until after the inspection and test flights to allow access to the rear of the fuselage.
The interior is starting to take shape as each of the panels is fitted and glued into position following the pattern that comes with the delux interior option. A marine plywood floor will be cut and fitted with hinges to allow access to the utilities compartment and provide a platform to store the luggage.

April 3, 5, 6, 7 & 13

On each side above the door is a section where a .016" sheet frame can constructed and fitted to provide a solid platform for the fuel level tube. I have also fitted a shelf for maps, flight plan and other resources necessary for cross-country flying.

Padding in the form of heavy duty Astro-Foil to AS1530.2 thermal insulation is cut and glued into position. The insulation wraps over the front edge of the dashboard and fits neatly against the windshield.
TIP: Glue the insulation while the windshield is in position to get a neat fit, however  remove the windshield once in position and smooth down the edges and remove excess contact glue.
Black vinyl padding extends from under the overhang of the dashboard and secured under the trim that holds the windshield into position.
TIP: Wrap the vinyl under a 1"x1/16" aluminum strap and rivet it to the  dashboard overhang so all you see is the vinyl and it will not come loose.

With the back panel cut to shape but not glued into position until after the aircraft has been inspected and completed its test flights, the wooden panel to cover the utilities compartments is cut to shape and fitted into position. Screws will be used to hold the panel into position to prevent movement  and carpet placed on top of the panel.

Looking into the cabin from over the dashboard

A view of the dashboard ready for the instruments

The fully adjustable seats make it easy to enter and exit the R80

The engraved black-on-white fuel gauge with lettering large enough so it can be easily read. There is a gauge on both sides for the dual fuel tanks. The gauge is calibrated from 0 to 40 litres in 5 litre increments.
TIP: Make a template and slide it behind the fuel line and as each 5 litres is poured into the fuel tank, place a mark on template. After engraving, drill a hole top and bottom to feed the fuel line through and onto the outlets on the fuel tank. Check again by pouring fuel into the tank, and when aligned, glue into it's permanent position.

Back to Construction Main Page